Webdev Project: Playing colors with Javascript
Table of Contents
Play with colors in JavaScript by creating a simple color palette webapp. This webapp will generate a color palette based on the input image.
The main goal of this project is expected to know the mechanism of RGB to HSL conversion.
Why you should use HSL? #
RGB (Red, Green, Blue) is an additive color model used to represent colors from electronic devices to human perception. In short, RGB is one way for humans to make computers understand colors that humans understand so far. The downside of RGB is that you also have to calculate the portion of 3 channels in each RGB color channel.
The presence of the HSL model comes to make it easier for us to manage colors on digital devices. Hue as a pure color itself, Saturation regulates the level of dullness (grayish) of Hue, and Ligthness regulates the bright intensity of Hue.
Webapp outline #
- Create a form for image input.
- Display the input image.
- Generate the color palette and shading based on the input image with the help of Color Thief.
Building webapp #
HTML and CSS #
Initial HTML:
<body>
<main>
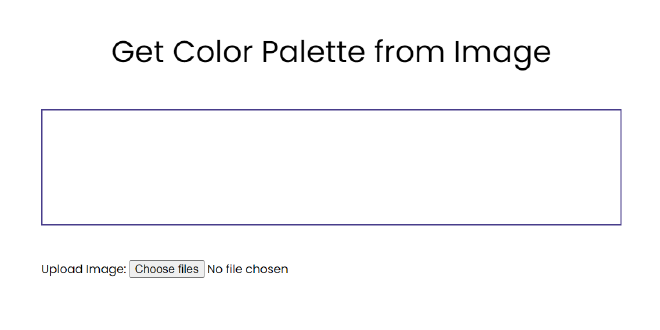
<h1>Get Color Palette from Image</h1>
<div class="output-container">
<img id="js-output"></img>
</div>
<p>
Upload Image:
<input type="file" multiple="false" accept="image/*" id="js-input">
</p>
</main>
</body>
The input tag is made to accept only one image file (png, jpg, png, etc…).
For CSS, it would be better if you reset the default browser stylesheet first with CSS Reset:
*, *::before, *::after {
  box-sizing: border-box;
}

* {
  margin: 0;
  padding: 0;
  font: inherit;
}

img, picture, svg, video {
  display: block;
  max-width: 100%;
}
Pages will be limited to max. 800px and will use the Poppins font.
main {
  margin: 0 auto;
  width: 800px;
  font-family: Poppins, sans-serif;
}
The top section focuses more on the input components:
h1 {
  text-align: center;
  font-size: 2.6rem;
}

h1, p {
  margin: 3rem auto;
}

.output-container {
  border: 2px solid darkslateblue;
}
For the bottom or the output component, maybe you can try styling manually first so that later you doesn’t messed up scripting the DOM in Javascript.
You can make two dummy swatches:
<div class="swatch-container">
  <div class="swatch">
    /* ... */
  </div>
  <div class="swatch">
    /* ... */
  </div>
</div>
Inside each swatch, there will be one big box for color-main which is the output color of Color Thief, and 10 colors that will be filled with shades of color-main.
<div class="swatch">
  <p>#color-code-01</p>
  <div class="color-container">
    <div class="color-main"></div>
    <div class="shade-container">
      <div class="shade"></div>
      <div class="shade"></div>
      <div class="shade"></div>
      <div class="shade"></div>
      <div class="shade"></div>
      <div class="shade"></div>
      <div class="shade"></div>
      <div class="shade"></div>
      <div class="shade"></div>
      <div class="shade"></div>
    </div>
  </div>
</div>
The result would be:

Javascript: Securing the biggest problem #
First, we will simulate RGBtoHSL() by converting the indigo color rgb(51, 0, 153) to hsl( 260, 100%, 60%).
const colorRGB = [51, 0, 153];

function RGBtoHSL(r, g, b) {

  return [h, s, l]
}

console.log(RGBtoHSL(...colorRGB))
Of course we have to debug the just function created with console.log()
Hue #
For conversion to HSL, all RGB channels must be normalized, the method is to divide each channel by the max. RGB value, which is 255.
$$ R^{\prime} = \frac {R} {255}\qquad G^{\prime} = \frac {G} {255}\qquad B^{\prime} = \frac {B} {255}\qquad $$
Then determine the \(\max\) and \(\min\) values of \((R^{\prime}, G^{\prime}, B^{\prime})\), and don’t forget to find the difference as well.
\(Cmax = \max(R^{\prime}, G^{\prime}, B^{\prime})\)
\(Cmin = \min(R^{\prime}, G^{\prime}, B^{\prime})\)
\(\Delta = Cmax - Cmin\)
function RGBtoHSL(r, g, b) {
  r /= 255, g /= 255, b /= 255
  const cmax = Math.max(r, g, b)
  const cmin = Math.min(r, g, b)
  const cdelta = cmax - cmin

  return [h, s, l];
}
The Hue formula is the most complicated of the three, the formula depends on \(Cmax\) and if they are all the same then the Hue is 0.
$$ H = \begin{cases} 60\degree\times (\frac {G^{\prime} - B^{\prime}} {\Delta} \bmod 6)\quad\text{if } Cmax = R^{\prime} \\ \newline 60\degree\times (\frac {B^{\prime} - R^{\prime}} {\Delta} + 2)\quad\text{if } Cmax = G^{\prime} \\ \newline 60\degree\times (\frac {R^{\prime} - G^{\prime}} {\Delta} + 4)\quad\text{if } Cmax = B^{\prime} \\ \newline 0\degree \quad\text{if } \Delta = 0 \end{cases} $$
function RGBtoHSL(r, g, b) {
  // ...
  let h, s, l; //Don't forget to declare HSL variables

  switch (cmax) {
    case cmin:
      h = 0
      break;
    case r:
      h = ((g - b) / cdelta) % 6
      break;
    case g:
      h = ((b - r) / cdelta) + 2
      break
    case b:
      h = ((r - g) / cdelta) + 4
      break;
    default:
      break;
  }

  h = Math.round(h * 60)
  // ...
}
Lightness #
The formula for lightness is the average of \(Cmax\) and \(Cmin\).
$$ L = \frac {Cmax + Cmin} {2} $$
function RGBtoHSL(r, g, b) {
  // ...
  l = (cmax + cmin) / 2
  // ...
}
Saturation #
The Saturation formula is somewhat similar to Hue, Saturation takes Lightness as the benchmark.
$$ S = \begin{cases} \frac {\Delta} {Cmax+Cmin}\quad \text {if } L \le 0.5 \\ \newline \frac {\Delta} {2-Cmax-Cmin}\quad \text {if } L \gt 0.5 \\ \newline 0 \quad\text{if } \Delta = 0 \end{cases} $$
function RGBtoHSL(r, g, b) {
  // ...
  if (cmax === cmin) {
    s = 0
  } else {
    s = l > 0.5 ? cdelta / (2 - cmax - cmin) : (cmax - cmin) / (cmax + cmin);
  }
  // ...
}
Honorable mention for Lightness #
The only formula that has no special conditions for \(\Delta = 0\) is Lightness, this is because \(\Delta = 0\) means all RGB channels are the same. The same channel always produce a white-black or grayish color range.
You can also shorten the code by making logic like this:
function RGBtoHSL(r, g, b) {
  // Variable declarations

  l = (cmax + cmin) / 2;

  if (cmax === cmin) {
    [h, s] = [0, 0]
  } else {
    // Hue conversion
    // Saturation conversion
  }

  return [h, s, l];
}
Javascript: Image Input #
To display the input image, use Javascript’s built-in FileReader.
const input = document.querySelector("#js-input");
const output = document.querySelector("#js-output")
let imageURL = "";

input.addEventListener("change", function() {
  const reader = new FileReader();
  reader.addEventListener("load", function() {
    imageURL = reader.result;
    output.src = imageURL
    output.alt = "Uploaded Image"
  })
  reader.readAsDataURL(this.files[0])
})
Javascript: Utilizing Color Thief #
The most practical way to use Color Thief is through a CDN.
Paste this at the very top of the HTML:
<head>
  <script src="https://cdnjs.cloudflare.com/ajax/libs/color-thief/2.3.0/color-thief.umd.js"></script>
</head>
Okay, now on to Javascript.
According to guide, you need to create a new instance to use Color Thief:
const colorThief = new ColorThief();
How to use it is quite easy, just call colorThief with the output element as an argument. But before that, make sure the image is ready or fully loaded.
const colorThief = new ColorThief()

output.addEventListener("load", function() {
  const getPalettes = colorThief.getPalette(output, 5);
  console.log(getPalettes); // For debugging purposes, optional
})
Above, we will take 5 colors based from the input image.
Javascript: Preparing the DOM for color palettes #
This part is neither too difficult nor too easy, as all it does is create a loop for swatch and 9 shade in each swatch.
function generateSwatch(color, swatchIds) {
  swatchIds = `sw-${swatchIds}`
  const divElement = document.createElement("div")
}
You need swatchIds as a unique class and divElement to create a new swatch element.
Then, you need a variable to store 9 shades of the input color color. Wrapped in a function will make your work easier:
function generateSwatch(color, swatchIds) {
  // ...
  function generateShade() {
      let shade = "";
      for (let i = 1; i < 10; i++) {
        shade += `<div class="shade shade-${i} ${swatchIds}"></div>`;
      }
      return shade
  }
  // ...
}
Why use string?, because here you will use innerHTML to fill the element you just created. Although this is the easiest way, it is very vulnerable to security if you use it for large-scale production.
innerHTML for large-scale production!To the newly created div, add a new class, swatch and swatchIds to create a new swatch. Then place your generateShade() function above into the innerHTML of the swatch:
function generateSwatch(color, swatchIds) {
  // ...

  divElement.className = `swatch ${swatchIds}`
  swatchContainer.appendChild(divElement)
  swatchContainer.lastElementChild.innerHTML = `
  <p>rgb(${color.join()})</p>
  <div class="color-container ${swatchIds}" >
    <div class="color-main"></div>
    <div class="shade-container ${swatchIds}">
      ${generateShade()}
    </div>
  </div>
  `

  // ...
}
So far, you have successfully created the HTML element. Now it’s just a matter of styling the background-color of each box to be the expected shade.
function generateSwatch(color, swatchIds) {
  // ...

  const mainColor = document.querySelector(`.${swatchIds} .color-main`)
  mainColor.style.backgroundColor = `rgb(${color})`

  let hsl = RGBtoHSL(...color)
  for (let j = 1; j < 10; j++) {
    const shadeClass = document.querySelector(`.shade-${j}.${swatchIds}`)
    shadeClass.style.backgroundColor = `hsl(${hsl[0]} ${hsl[1]}% ${j * 10}%)`;
  }

  // ...
}
Above, looping 9 times will create 9 shades of the input color color, the first lightness will be \(10\%\), then \(20\%\) and so on.
Javascript: The final step #
You have everything set up, now all you have to do is go back to the eventListener of output and use forEach() to iterate through the color palette of the variables above it:
output.addEventListener("load", function() {
  const getPalettes = colorThief.getPalette(output, 5);
  getPalettes.forEach((element, index) => {
    generateSwatch(element, index)
  });
})

Javascript: Bug #
When you change the image for the second time, the previous 5 palettes still leave traces. This is because generateSwatch() keeps adding new elements every time the image changes.
To prevent this, you have to reset the innerHTML of the element in the swatchContainer variable every time the image is changed:
input.addEventListener("change", function() {
  swatchContainer.innerHTML = "" // Add this to reset the contents of each image change
  const reader = new FileReader();
  reader.addEventListener("load", function() {
    imageURL = reader.result;
    output.src = imageURL
    output.alt = "Uploaded Image"
  })
  reader.readAsDataURL(this.files[0])
})
Final Result #
My complete final results can be found here: